Showing posts with label spring. Show all posts

24 March 2012

Spring Time= Stinging Nettles and Dandelions

Hello!  It has been quite a while since I have updated this blog and I am trying to rectify that now.  I feel like I have a good reason for not being active for such a long time....we are expecting our first little one any day now!  We found out in the middle of summer and I was just not feeling well enough to write or take photographs.  Then it turned to fall and winter and there was not much I wanted to write about, not to mention baking a baby is exhausting!  Now that it is spring again and the garden is starting to burst, I am becoming inspired once more.  Plus I am on maternity leave at this point and I have some extra time on my hands.

Iz's apprenticeship went very well.  It ended at the end of October and he misses the farm.  Luckily our yard has been keeping him busy!  I will have other posts dedicated to our plans for the season after I get some more photos taken.

The topic today is Stinging Nettles (Urtica dioica) and Dandelions.  Some people are lucky and have Nettles growing wild on their property, just like Dandelions do; but we are not so lucky, so we planted some last year.  Early Spring is the best time to harvest Nettles so we got to work today!  Once the Nettles bloom later in the summer, it is best to just keep cutting them back and throwing them in the compost or just let them go for next year and cut them back at the end of the season.


When harvesting Nettles, make sure you wear gloves.  They really do sting!  Iz used regular gardening gloves for harvest and moved to food safe gloves in the kitchen when removing the leaves from the stems. He had to double up on the gloves as he was getting stung through one layer.


We are making two things with our Nettle harvest. A potato and nettle soup and a nettle hair rinse.  Both recipes are in one of our favorite herb reference books: The Complete Herb Book by Jekka McVicar.

Scarlett and the Nettles


The hair rinse is as easy as making tea.  Add a large handful of nettles in a pot on the stove, bring to a boil and simmer for 15 minutes covered.  Strain into containers and let cool.  To use, pour through your hair after shampooing. We just made this so I will have to report back about how it works. This is good for general conditioning of your hair but also good for preventing hair loss, itchy scalp, and dandruff. (McVicar)  I was "Googleing" around looking for other nettle inspiration and came across another blog post about making the nettle hair rinse.

The soup includes nettles, potato, onion, milk, lovage, lemon thyme, oregano all blended after cooking together.


We had a bunch of leftover nettles so we are using a borrowed dehydrator to dry the leaves to use as tea as needed.  According to McVicar, nettles are used as a diuretic, for anemia, and as a tonic to get useful vitamins and minerals we might lack during the winter, including vitamin C and Iron.


It is important to note that to eat nettles, you must cook them!  Eating the plant raw can cause kidney damage and poisoning. (McVicar)

Here are a few external sources talking a little more about Stinging Nettles as a plant and uses.

We have plenty of Dandelions growing all over our yard.  If you are going to harvest in your yard, make sure that there haven't been any herbicides or other chemicals sprayed on or near your crop.  You don't want to eat that! Also, try to harvest away from the road as there can be all kinds of yucky stuff coming off of cars and the road. Try to harvest the leaves when they are a young as possible as they will be more tender.


All we are doing with the Dandelions is cleaning off the roots to roast and keeping the leaves to eat in salads or I'm thinking about adding them to an herb pesto with thyme and leftover nettles.

Roasted Dandelion root is used commonly as a coffee substitute.  I have not tried this yet, so I will be report back.

When dealing with herbs on your own, I strongly recommend doing a little research first to make sure there are not any contraindications for your own health status.  Some herbs can interact with drugs, and specific medical conditions.  Read more than one source to make sure you get a well rounded profile of the herb and the opinions of several experts.  Some of the resources we use are as follows:

Mountain Rose Herbs

Books by Richo Cech, owner of Horizon Herbs

Susun Weed

and as I mentioned before Jekka McVicar

20 June 2011

CSA Week 4 and Butter!


Our CSA bag is getting heavier each week.  The fare is changing from Spring to Summer vegetables.  This week's share includes: one head of red leaf lettuce, a bunch of kale, a quart of new potatoes, snap peas, broccoli, two heads of green garlic, beets, a head of cabbage, carrots, green onions and one zucchini.  I roasted the new potatoes with olive oil, salt and pepper. They are yummy just like that but you could add sour cream for dipping to make it even more fabulous.  I'm planning on making cole slaw with the cabbage and the carrots that seem to be multiplying in the fridge. I like to make a similar dressing to the creamy one I mentioned in a previous post. I want it to be a little creamier than the dressing, so I may add a little sour cream to the mayo and yogurt.  I love cole slaw the best when it is fresh and crunchy.


We bought duck eggs last week and I am going to try them in pancakes tomorrow morning.  Apparently, duck eggs are good for baking, making cakes extra fluffy and moist, pancakes included. I may try making some cupcakes later this week so I can share them with Isaac this weekend.  Also, they will probably make it into my now becoming, weekly frittata.  Here is more information about duck eggs for you to consider until my next post.
Tonight I was feeling a tiny bit ambitious.  I have had two pints of heavy cream kicking around in the refrigerator for quite a while now-past their "expiration" dates even.  We have a friend who makes his own butter so I count him as inspiration.  For additional information, I use the book Self Sufficiency for the 21st Century by Dick and James Strawbridge.  It is a very interesting book with many different instructions to help you become more self-sufficeint-from making butter to farming to collecting and filtering rain water to making your own composting toilet. (yay!)  The section on making butter was very easy to follow with lots of photos explaining the details of making butter from cream.  One thing I didn't realize is that I did myself a favor by letting the cream sour a little as you want that characteristic for making butter. In the book, they don't really explain why so I found out more information.  I must admit that the cream I used was not grass fed or organic, it was ultra pasteurized heavy cream that I bought while it was on sale in the late winter. I plan on using more local and grass fed cream in the future, but you don't have to, the cream I used worked just fine.

I used a stand mixer, but you can use hand beaters, or even just shake it in the container in which it comes. I added the cream to the mixing bowl and turned it on medium high.  I let it beat until the cream broke down into little butter clumps and the buttermilk began to separate from the butter.  I drained the buttermilk, added a little cool water and beat until the butter began to come together.  I strained more butter milk and turned the butter out onto a wooden cutting board.  I then added more water and began to mix and knead it with the spatula.  This is called "washing" the butter.  You are removing the remaining buttermilk. When the water runs clear (about three series of kneading the butter and draining the buttermilk) add salt to the butter (the book recommends 2% of its weight, but I just threw some in there). 

Kneading the butter
I then added chopped fresh herbs to the butter and incorporated it all together.
A combo of parsley, thyme and sage

I then rolled it up in waxed paper and put it in the freezer to firm it up a bit.  I made another batch with lemon balm, lemon verbena and lemon zest.  I plan on using the buttermilk in the pancakes and the lemony herb butter on top when they are ready to eat.  I don't have a fancy butter mold, but maybe I'll come across one someday!


13 June 2011

CSA Week 3

We had a busy weekend so this is the first chance I have to do our weekly CSA update.  It still looks like spring in the CSA share: two heads of lettuce; one red, one romaine; three small heads of broccoli, a large bag of those peas that I am loving, green onions, carrots, fennel (yum!) and apple mint (super yum).


We also get a share from Smaller Footprint, but I didn't take a photo of that for the week. It is pretty similar except for the addition of radishes, swiss chard, and strawberries!
I went to the farm on Friday and helped out for the day.  One of the tasks was to pick strawberries for CSA shares.  After competing with spiky thistle, very tall grass and one angry bird squawking at us the whole time, we got to take home some literal fruits of our labor.  Tart and sweet. They didn't last long enough for me to consider what to do with them. We just ate them as is.

I made a frittata with spinach, garlic scapes, green onions and feta cheese last week.  Fritattas are easy to make and easy to take to work for lunch.  I'm planning on making another one tomorrow morning using the broccoli, onions, scapes and swiss chard.  I don't use a recipe, I just cook the vegetables first, remove from the pan, add the eggs (about 6) whipped with a little bit of cream to the pan, let them set in the pan and then add the cooked veggies and cheese.  Put under the broiler for a few minutes until set. I'll try to take a photo of my creation tomorrow. Here is an inspiring recipe for those who would rather have one. 
I haven't forgotten about the fava beans! I will make something with them soon.

Isaac and I are in the process of looking for our own little piece of land; 6-12 acres to be exact.  If anyone has any leads, or has a friend of a friend etc., please let us know!

05 June 2011

CSA Week 2/Farmer's Markets

This is the first week that the Hyde Park Farmer's Market is on Hyde Park Square. This creates an increased visibility for the market, more space for everyone to walk around, more shade as the square had many lovely well established trees and possibly more traffic to the stores that flank the square if they are open on Sundays.
We don't live in Hyde Park, so why do we go to this Farmer's Market versus others? It really is mainly because Hazelfield Farm sells there and that is where we pick-up our CSA every week. We have met other farmers that we like and buy from every week.  The market is on a Sunday, so that helps too as I work on some Saturdays.  There are plenty of other Farmer's Markets to visit in the city and I would like to try to go to others sometime this summer.  Here is a list of just a few.
Not just a Farmer's Market but definitely worth mentioning: Findlay Market. The busiest day is on Saturday and there is a whole wing devoted to local farmers during the growing season. There is also meat vendors, bakeries, cheese shops etc.
Anderson: Saturday's 9:00-1:00
Loveland: Tuesday's 3:00-7:00
Sayler Park: Tuesday's 4:00-7:00
Wyoming Farmer's Market: Tuesday's 3:00-7:00
Northside: Wednesday's 4:00-7:30
College Hill: Thursday's 3:00-6:30
Cheviot:  Friday's 3:00-7:00
Here is a link to even more!
What/Where is your favorite farmer's market? 

We are beginning to experience first hand how much work goes into bringing food to market.  10-12 hour days are the norm for a farmer during the growing season.  There is constantly something that needs attention, whether it is mulching to keep the weeds down, or chopping weeds; preparing beds, feeding animals, sowing seeds or planting seedlings and much more.  This doesn't even include harvest days.  All of those portioned out pints of peas, or bunches of radishes were most likely be done by the farmer or their family.  All of this and then they still have to go to market and sell the product. Then finally they will get paid for their work.  Vegetables at the grocery store may be slightly less expensive, but most of it comes from large farms with large machinery and cheap migrant labor to help. Even then, those farmers don't make a lot of money based on the amount of work they put into the crops.  What I'm trying to say is that if you go to the farmer's market, know that most likely the money you hand the farmers goes into his or her pocket to take care of their farm and family.  This is the essence of a local economy that is waning in the time of large corporations.  Don't think for a second that a lot of farming isn't  part of a large corporation.  If you have ever heard of Monsanto, Cargill, Conagra-to name a few- these are agri-businesses that are pushing small family farms out of business.  By supporting local farmers, and other businesses you are investing in your community and getting fresh, healthy food in the process. By local I mean a 100 to 200 mile radius of where you live. Some people would even say buying American is akin to buying local.
Ok, I will step off my soapbox, in a moment.  It is not my mission to preach to people I don't want anyone to feel bad that they are not doing anything that I mention.  I just feel the need to let you know my viewpoint, where I am coming from. I am not an economist, I don't have statistics or fancy charts to back up my opinions. I am just trying to communicate what makes sense to me.  I encourage discussion, so please do not hesitate to ask questions and continue the dialogue.  Everyone has a different perspective there is no one right answer for everyone. Not everyone can have a garden, not everyone has access to farmer's markets, however, there is no denying that Americans need to eat more fresh food.  We are all creative and thoughtful human beings and it is important to discuss how we can try to create a healthier life for ourselves, our children and future generations.

Moving on!  This week's CSA varies a little bit from last week's.

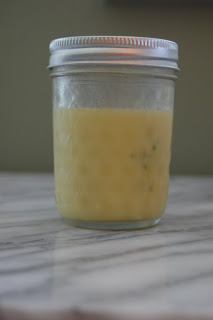
Two heads of Red Leaf Lettuce, a bunch of green onions, swiss chard, carrots, garlic scapes, broccoli, snap peas (the sweetest I have ever eaten, I have to restrain myself or they will be gone in a day!), and fava beans.  The lettuce is cleaned, dried, chopped and put in a bowl in the fridge with a damp paper towel over it. I cut up a carrot, radishes from Smaller Footprint, green onion and scapes. Add some walnuts, Craisins and Parmesan slivers and we had some delicious salad! I made a new salad dressing this week, sort of like a ranch, but better. I added the following ingredients into medium mason jar, largest quantity to smallest. I don't measure, so the amounts are approximate. You can change the ratios to make more or less.

1/2 c. whole milk yogurt
1/4 c. mayonnaise
1/4 c. olive oil
2 Tbl. white wine vinegar (or lemon juice)
1 Tbl. Dijon mustard
2 tsp. honey
1 large garlic clove finely chopped
salt and pepper to taste
Any fresh or dried herbs you like 
( I added fresh oregano, apple mint, lemon and regular thyme)

Shake it up vigorously until emulsified. Enjoy!

I am still deciding what to do with the fava beans.  We bought a whole chicken at the market today, so I'm thinking about making this.  We have radishes, and the arugula in our garden is quite abundant, so that would use some of it up.  Or maybe I will just do something simple like this subbing the creme fraiche with yogurt or sour cream. I want to use what I have on hand, not buy extra stuff for a recipe. I know this will not always be possible, but I'll do my best.  I'm also thinking of a puree of some sort, like a hummus with the fava beans. I'll report back when I make up my mind.

30 May 2011

First CSA pick-up

After a two week delay due to the wet and cool weather, we were able to pick-up our first CSA basket at the Hyde Park Farmer's Market yesterday.

Included in this week's pick-up: Three different lettuces (buttercrunch, romaine, and red leaf); Green Onions, Broccoli, oregano, mint, radishes, garlic scapes and swiss chard. I wanted to weigh everything, but I couldn't find the kitchen scale as the kitchen is still not all the way put back together. I will start doing that next week, Isaac found it after I had used some of the veggies.
I made a giant salad last night to eat through the week with some of the lettuce Isaac brought home from the farm, the buttercrunch lettuce here, radishes and green onions. I will add walnuts, Craisins and chopped garlic scapes when we are ready to eat it.
 This is what the scape looks like on one of our garlic plants. They grow on the hard-neck varieties of garlic. This will be the bloom and eventually seed of the plant if left on. They taste like garlic but much milder. You can leave the scape on if you want to save the seed, but removing it to eat will allow the plants energy to focus on growing a larger bulb. Here is more information!
I make my own salad dressing with lemon juice, olive oil, a crushed and chopped garlic clove, dijon mustard, honey, thyme and oregano and salt to taste. I make it in a mason jar and shake it until it is nice and emulsified.
Most of this CSA will be devoted to many salads which is fine with me because I don't think I will ever tire of eating salads. Now, cooked greens I can make me a little weary after a while, so I'm making Kale chips to share with family today.  We have Tuscan Kale growing in our garden and Isaac brought home a curly variety from the farm.

I think I mentioned making Kale chips before. Isaac's sister turned me on to them. I highly recommend them to people who aren't sure if they like greens or are tired of cooking them the same way all the time.  Try seasoning them with different spices. I'm making batches with salt, black pepper, and hot Hungarian paprika. Here is the recipe I'm using today.
 Finished, with many more batches to go.

I am also making an asparagus salad with asparagus from the farm, green onions and radishes.  It will be kind of like the recipe here, minus the mushrooms.
I hope everyone is having a pleasant Memorial Day! We are thankful to all of those who have sacrificed their lives for our country. I am happy that I get Isaac one extra day this week.


01 May 2011

It Has Begun!

It is finally time for Isaac to go to Yellow Springs and start his apprenticeship with Smaller Footprint Farm.  This is bittersweet as I will miss him very much until I see him on the weekends.  Despite missing Iz, I am really proud of him and happy that he is doing this!

We packed Iz up this morning, put his bike in the back of the truck and we were off.  We met Doug, one of the farmers, and he introduced us to Al, the man with whom Isaac will be staying with while in Yellow Springs.  Al is a very nice man who is a retired farmer.  He is also a veteran host as he told us that he has had people from China, Russia and Africa to name a few stay with him in the past.

 After we unloaded the bags, we followed Doug to the farm where he gave a tour.

The entrance:


View from the other side
Doug pointed out all of the beds that are growing vegetables for their CSA including, onions, Red Russian Kale, Kholrabi and Radishes to name a few.  We also saw the green houses/hoop house with tomato and other seedlings.

We then had the pleasure to meet the newest additions to the farm:

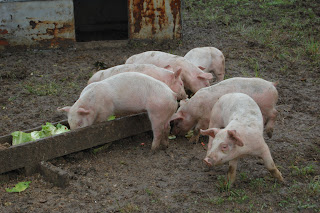
Pigs!

And they sure live up to their name when the eat!

We then took a stroll over to the chickens.  Here is one proud rooster!

The stylish coop.

See more chicken photos here.

I think Isaac is going to have a lot of fun even if working on the farm is going to be hard work!
After our tour of the farm, Iz and I decided to take a tour of the town. We have been to Yellow Springs before, but we wanted to spend as much of the day together.  Besides, we had never been to the famous Young's Dairy.  Every time we tell someone about Isaac working on a farm in Yellow Springs, they mention Young's.  So off we went. We had some yummy ice cream.


And met some super cute goats!

Again, please click here to see more photos.


It has been a busy and emotional day and there are many more days to come.  I think Isaac will post some entries in the future, I hope. We just have to make sure that he has access to wifi.  Thanks to everyone who has been so great to us. We really appreciate all of your support and encouragement!


24 April 2011

Catching Up&Weeds

It's been raining cats and dogs here this April.  It has literally put a damper on our outside activity so far this month.  Isaac only has one more week at home and we are scrambling to finish some home projects before he leaves.  We are currently in the middle of a medium sized kitchen remodel which has also kept us from the yard.  Despite all of this, we have had a little garden activity.

A lot of our two year old parsley did really well over the winter, we were able to dig under the snow and clip off a few sprigs of fresh parsley which was nice during this past bitter winter.  However, this parsley is biennial, which means that it during the second year it will flower, set seed and die. Parsley is a very nutritious herb and easy to grow. It is a great staple if you have limited garden or container space for your herb garden. Here is some nutritional information about parsley.  Although the parsley we have is abundant (5 very large chunks) all of it is going to flower soon, so we are trying to use it up before then.  Isaac removed three large plants and we made pesto with it.  I LOVE pesto!  Fresh basil pesto is my favorite, but I will eat it made with parsley, thyme and arugula to name a few.  We don't really follow a recipe, just eyeball everything (that is how I make salad dressing too).
All you need it a food processor or blender. If you are really hardcore, like some people we know and admire, you can make this with a mortar and pestle.

Take a handful of your herb, in this case parsley.  Place in your mixer of choice.  Add 3-4 smashed cloves of garlic. (This can be more or less to taste, but for me garlic, next to the herb, is the most important flavor in pesto.)  Next add 1/4 c. or so of nuts.  We use walnuts because they are cheaper than pine nuts, but you can really use any kind of nut or seed. Add 1/4 c. of Parmesan cheese, either grated or in small chunks.  Add a small amount of your oil of choice, we use olive, to the rest.  Pulse the processor until the ingredients start to incorporate. Next add more olive oil until the ingredients start to blend finely and becomes a loose paste.  Add salt and pepper to taste.  Add to pasta, sandwiches, veggies, bread etc.


We also had quite a bit of red Russian kale that overwintered nicely.  It was starting to bolt so we pulled it up and made Kale chips!
I learned about this from Isaac's lovely sister.  Preheat your oven to 350 degrees.  Wash, dry and separate your kale. Spread on a baking sheet. Spray or drizzle olive oil onto the kale. Sprinkle with sea salt and any other seasonings that you like. Bake for 10-15 minutes until the kale shrinks and starts to crisp and lightly brown. Let cool and enjoy! These taste like or better than regular chips. They are light crispy and almost melt in your mouth. If you get kale at the farmer's market, your yard or even the store-give it a try! Here is a very nice blog post about kale chips. Here is a photo of some of our kale chips after they came out of the oven. Ignore the messy stove!
 
I suspect many of the plants are enjoying the warmer weather and copious rain. Including the "weeds".  We don't weed in the garden per-se, only when the grass or trees or other somewhat large or invasive plants start growing where we want other stuff to grow.  We treat the plants that volunteer in our garden as allies.  Dandelions aerate the soil and bring up nutrients with their long tap roots and attract pollinators, clover fixes nitrogen and is food for the rabbits (instead of our veggies!), dead nettle is a nice ground cover as their roots grow mainly lightly along the top of the soil, they also attract bees and other beneficial insects.  Here is a photo of all three hanging out in the garden.

So before you start spraying the RoundUp, spend hours on your hands and knees or call your local chemical lawn service.  Remember that lots of these plants are beneficial to your soil, food for animals, attracts beneficial insects and look pretty as well!  Here is another informative blog post on this matter.
I hope to be updating this much more often.  This week will be busy for us, but I should have more time to blog once Isaac is settled and the kitchen is back together.
I'm sure I speak for everyone, I am so happy that it is getting warmer and greener everyday!

17 April 2011

New Plants

*Click on the Links for more information about the plants mentioned!*
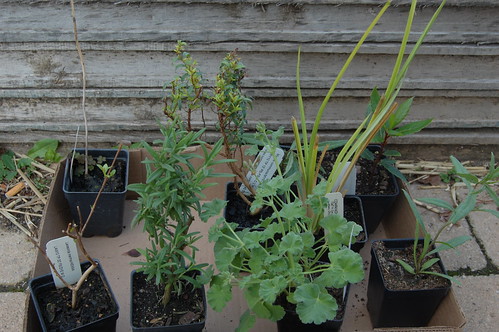
Last post I showed you some new plants we bought from Companion Plants.  We are slowly finding homes for them and others that have been waiting for attention for a little while.
One of the homes for several plants is the finished compost pile I shared with you in an earlier post.  Here is the pile now:

It's hard to see, but there is a species (wild) rose: Rosa sancti-andreae (syn. R. villosa?) at the top of the pile.  It will get rather large: 6ft tall and spread; and have small pink flowers.  While this plant will be beautiful in its own right, we are also growing this for its hips that will emerge after the flowers fade. Rose hips are high in vitamin C among other things. Surrounding the rose are small clumps of Roman Chamomile (Chamaemelum nobile) that we are hoping will spread all around this pile. I think most people are familiar with Chamomile tea. Once the plants start blooming, you can collect the flowers and the leaves to make a soothing cup.  Ideally, when the hips on the rose form, we can collect the hips and the chamomile to make an even more nutritional tea. The final plant in this arrangement, to the left and bottom of the pile, is Sweet Woodruff (Galium odoratum) that Iz collected from my most gracious parents who have too much of it. It likes moist and shady places and we hope that the shed next to it and the Paw Paw behind it will give it enough shade in the hot summer months.
Sweet Woodruff is used medicinally for stomach ailments as well as in culinary applications such as to flavor teas and juices.  It is also used to flavor May Wine which is a punch made with Woodruff infused white wine, oranges, pineapple and sugar. This is only one example of May Wine as apparently there are other versions with different flavors. We are really looking forward to making herbal teas from the garden once again. There is nothing like gathering a bunch of fragrant herbs and making a nice iced tea with honey to drink on a hot summer evening. Perhaps that will be a blog topic in the near future!

Since the taking of this photo Iz has added more to this bed: Lemon Verbena (Aloysia citriodora) (another delicious herb in tea or putting under the skin of roast chicken); Codonopsis (Codonopsis pilosula), Meadowsweet (Filipendula ulmaria), and Meadowfoam (Limnanthes Douglasii)

In other plant news Iz planted the Goji Berries (Lycium chinese or barbarum). It is also known as Matrimony Vine.  The folklore attached to this plant states that one must not plant this vine near the home as it may cause "marital discord".


This is Iz planting the Goji in one of the beds at the front of the house, and with my permission, near the house! While the folklore is charming, the best place we have for the Goji is near the house. We promised to move it if we start lashing out at each other for no reason.  This is a vine and Iz added some stakes next to the plants to give them something to climb on.
I better end this now, we have more additions but I will leave that for later! I shall leave you with a little honeybee that was visiting our tulips. Bzzz Bzzz!

10 April 2011

Road Trip: Companion Plants

Iz and I took a trip to Athens, Ohio this week to visit a nursery where Iz has bought a lot of our plants. We drove three hours to visit Companion Plants buy a flat of plants and then drove home! The drive through South East Ohio is beautiful, changing from flat farmland to rolling pastures to dense pine forests. There is really no major interstate that goes from Cincinnati to Athens, so there is plenty of scenery.


We have met the owner of Companion Plants before at and herb festival, but Iz took a moment to reintroduce himself and chat. The owner is so nice and knowledgeable! We took our time to browse, they offer around 600 different plants, and started to accumulate a nice stash of plants.
DSC_0158

Click the images to see what we purchased.

DSC_0154

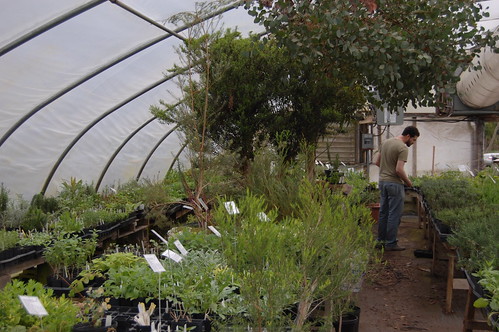
Here is Isaac browsing in a small section of the greenhouse. Look at the eucalyptus tree!
DSC_0144

There were some really cute terra cotta plant tags for sale but I abstained from buying any.
DSC_0148

 We didn't manage to plant everything when we got home, but we found a home for the Kentucky Colonial Mint. Isaac divided the plant into three to give it more opportunity to spread around the bed.


 I can't wait to use it in tea and other yummy summer drinks!


Even though it was a short road trip, we had a great time!

01 April 2011

Cover Cropping It

Since my last post was about working with your soil to get it healthy and nutritious, I thought I would continue on the theme and talk about growing cover crops.  Generally this is done after your last harvest of whatever you have grown for the season or if you are planning on leaving a plot empty for a season or two. This publication will give you a lot of specific information on choosing which plants to grow and all the benefits or growing cover crops and green manure.

I found a few good passages to put here to give you a better idea of what I am talking about.

"Green manuring" involves the soil incorporation of any field or forage crop while green or soon after flowering, for the purpose of soil improvement. A cover crop is any crop grown to provide soil cover, regardless of whether it is later incorporated. Cover crops are grown primarily to prevent soil erosion by wind and water. Cover crops and green manures can be annual, biennial, or perennial herbaceous plants grown in a pure or mixed stand during all or part of the year. In addition to providing ground cover and, in the case of a legume, fixing nitrogen, they also help suppress weeds and reduce insect pests and diseases. When cover crops are planted to reduce nutrient leaching following a main crop, they are often termed "catch crops."


A major benefit obtained from green manures is the addition of organic matter to the soil.

Cover crops will also aid in fixing nitrogen into the soil. provide a healthy ecosystem for beneficial bacterial and aerate the soil.

Iz and I chose to add some winter cover crops to our large raised bed last fall. We sowed seeds for winter rye, red and white clover, dandelion and alfalfaSince this was the first year for this raised bed, which is sitting on top of plain old Ohio clay soil, we wanted to try and break up the soil beneath the bed and encourage the worms and other nutrients to travel up into it.


It looks a mess but will be incorporated into the soil as it decomposes
A winter cover crop is planted in late summer or fall to provide soil cover during the winter. Often a legume is chosen for the added benefit of nitrogen fixation. In northern states, the plant selected needs to possess enough cold tolerance to survive hard winters. Hairy vetch and rye are among the few selections that meet this need. (From the ATTRA Publication)

We turned over the plants two weekends ago and found that the plants did a good job and rooting deep and providing some organic matter to build the soil as it decomposes.

Look at the tap root and root system of this red clover!


The nice thing about having dandelions in the mix is that you can eat the greens and dry the root for tea instead of turning them into the soil. They just might be the first edible crop you harvest from your spring garden! Enjoy!